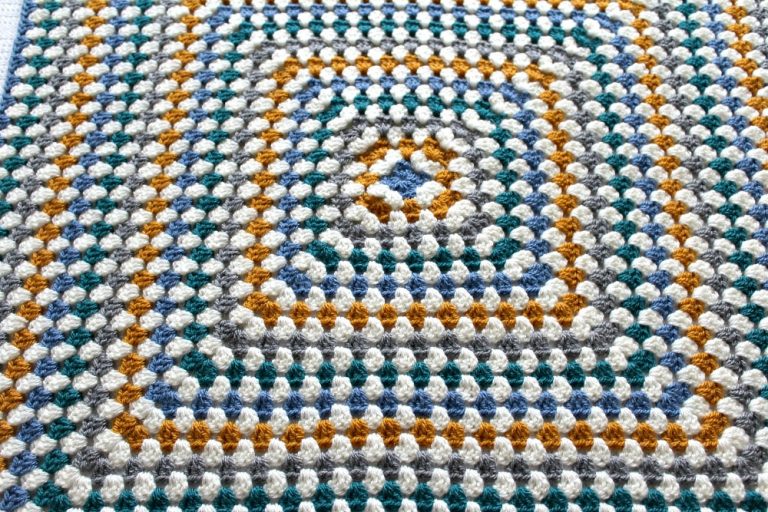
Today’s post is about how to stop a granny square from slanting… We have all been there, you get really excited about doing a granny square blanket because its nice and easy and you get to about row 15 and then you look at your masterpiece and you think something looks a bit off, is it slanting you ask yourself, noooo it cant be you think, you carry on anyway and think it will sort itself out, by row 35 you lay it down flat again to look and now its looking not so nice and you are wishing you never started it! Or maybe you are one of the lucky ones and have read this post before you started your blanket because you hear those darn granny square blankets slant hehe!!

This post includes affiliate links – Please see my Privacy Policy for more info.
So this isn’t a massive secret on how to keep the granny square straight and i am sure other crafters have their own way as there is no right or wrong answer.
My version of keeping a granny square straight and to stop slanting is after each round turn your work for example, After round 1 is complete and you have turned your work to begin round 2 the wrong side of your work will be facing you, after round 2 is complete and you have turned your work to begin round 3 the right side of your work will now be facing you – So you are basically flipping your work over after each round before you begin your next round, by doing this will stop your square from slanting as it gets bigger.
Also fasten off after each round is complete even if you are not changing colour and join yarn in any ch2 space to start new round.
Below is a 4 round granny square pattern for you to try by putting my above method into practice.
Hope you enjoy this weeks free crochet pattern and come follow Wool and Stitch on Instagram to be kept up to date with the latest designs @wool_and_stitch
Clare xo
** You can purchase an inexpensive AD free PDF version of all my patterns on Craftsy here **
Pattern:
R1. Ch4, join with a slip stitch to beg chain to form a ring, ch2 (counts as 1dc) 2dc in ring, ch2, 3dc in ring, ch2, 3dc in ring, ch2, 3dc in ring, ch2, join with a slip stitch to beg dc, slip stitch into next ch2 space, fasten off, turn
R2. Join yarn in any ch2 space, ch2 (counts as 1dc) 2dc in same space, ch2, 3dc in same space (corner made) work (3dc, ch2, 3dc) in next 3 ch2 spaces (corners made) join with a slip stitch to beg dc, slip stitch into next ch2 space, fasten off, turn (x4 (3dc, ch2, 3dc)
R3. Join yarn in any ch2 space, ch2 (counts as 1dc) 2dc in same space, ch2, 3dc in same space (corner made) * 3dc in next space between the corners, work (3dc, ch2, 3dc) in next ch2 space (corner made) * Repeat around, work 3dc in last space between the corners, join with a slip stitch to beg dc, slip stitch into next ch2 space, fasten off, turn (x4 (3dc, ch2, 3dc) + x4 (3dc)
R4. Join yarn in any ch2 space, ch2 (counts as 1dc) 2dc in same space, ch2, 3dc in same space (corner made) * 3dc in next 2 spaces between the corners, work (3dc, ch2, 3dc) in next ch2 space (corner made) * Repeat around, work 3dc in last 2 spaces between the corners, join with a slip stitch to beg dc, slip stitch into next ch2 space, fasten off, turn (x4 (3dc, ch2, 3dc) + x8 (3dc)
** You can purchase an inexpensive AD free PDF version of all my patterns on Craftsy here **
** You can sell the products you make from my patterns but please link back to my post. Please do not copy and reproduce and claim my patterns as your own. **
Would you like more free patterns? Keep in touch on my
Facebook or
Instagram for new pattern sneak peeks and when they will be available on my blog! Feel free to post pictures of your finished makes on my Facebook wall or tag @wool_and_stitch on Instagram so we can all see.

